Adding a Custom Hostname
To add a custom hostname, please click the ‘Custom Hostname’ link on the plugin settings page. It will redirect to the connected Pull Zone’s setting page on bunny.net.

Here you will be able to add a custom hostname.
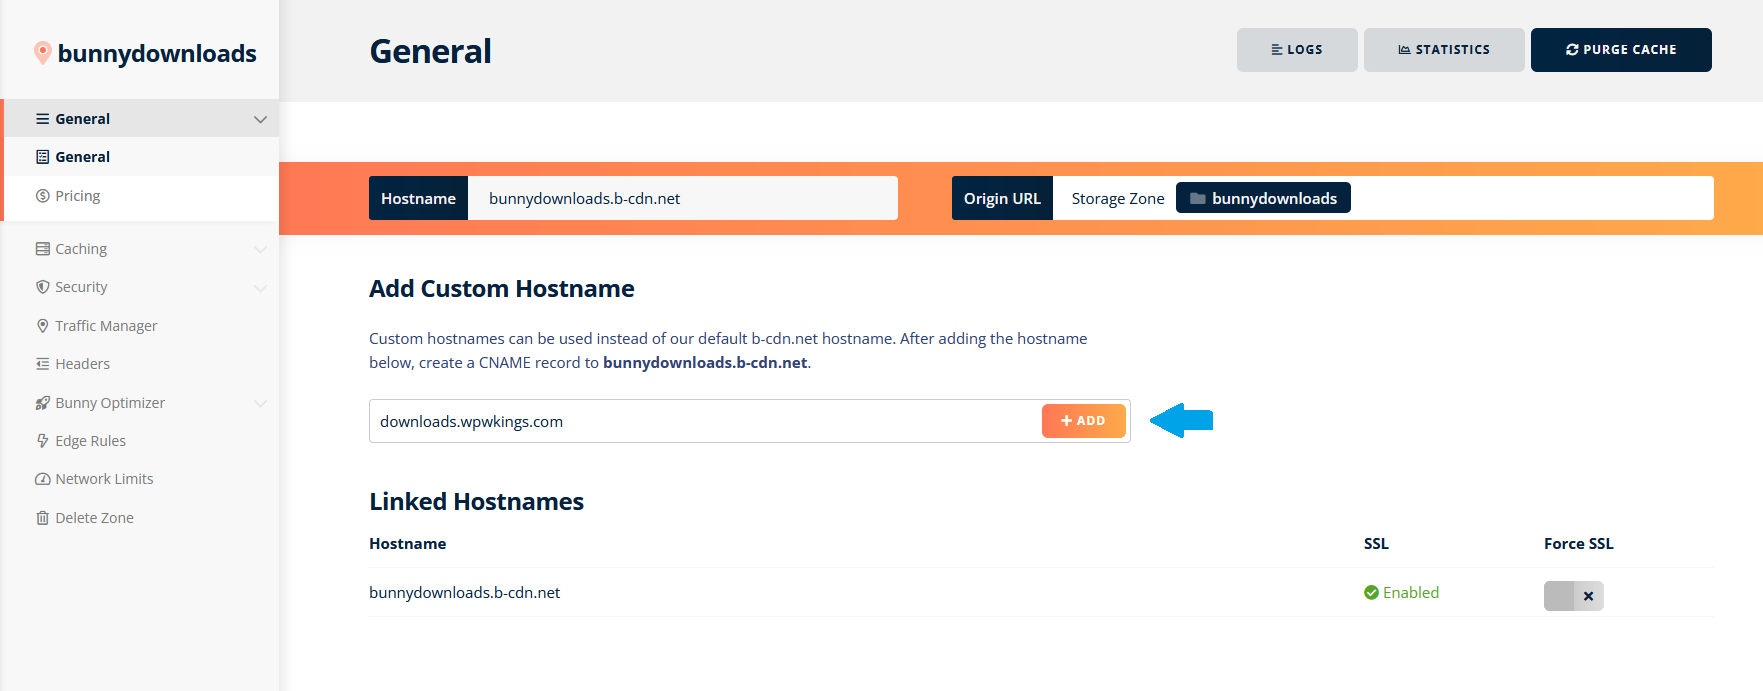
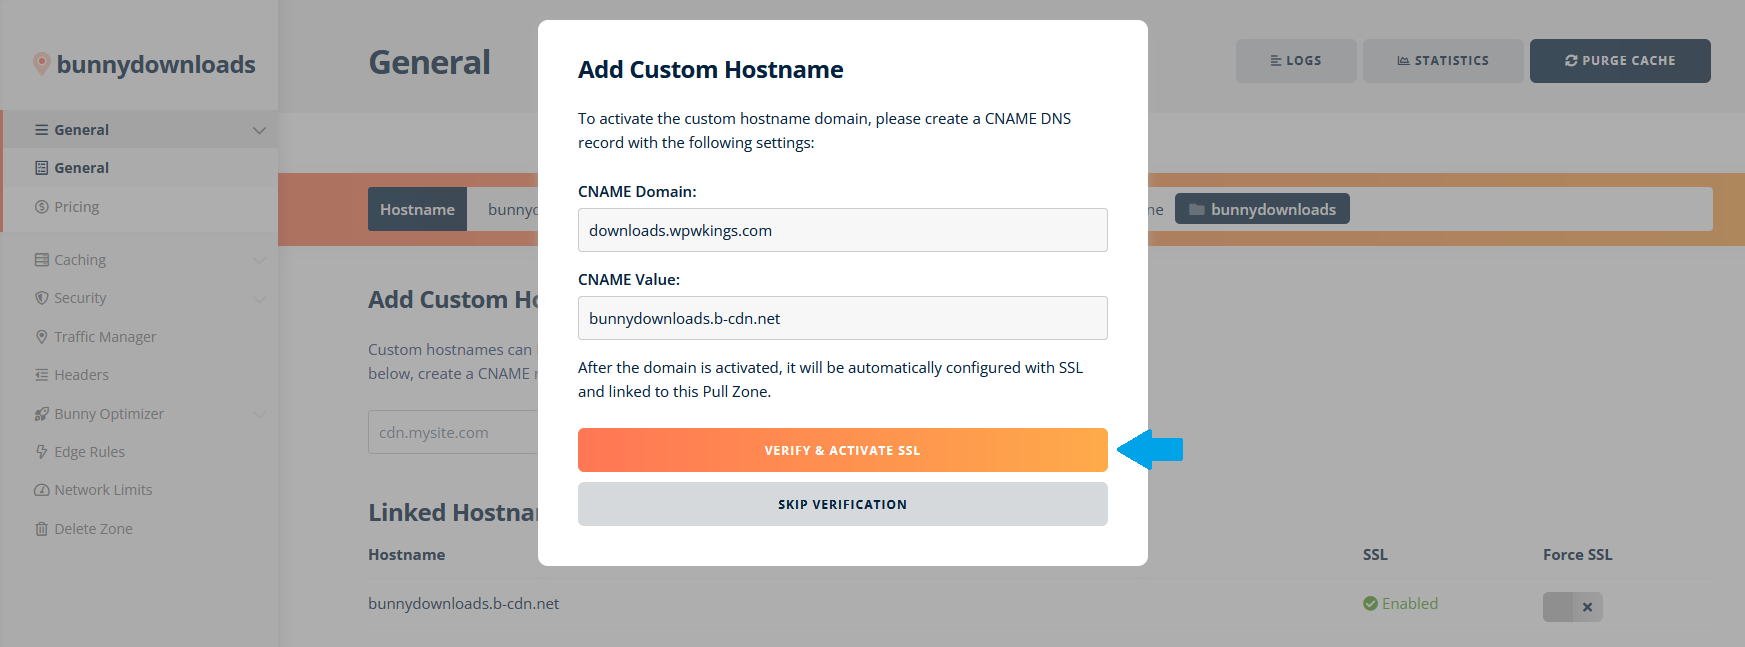
Before continuing to the verification, please make sure to set up the correct CNAME record at your domain registrar or DNS manager.
Activating the Custom Hostname
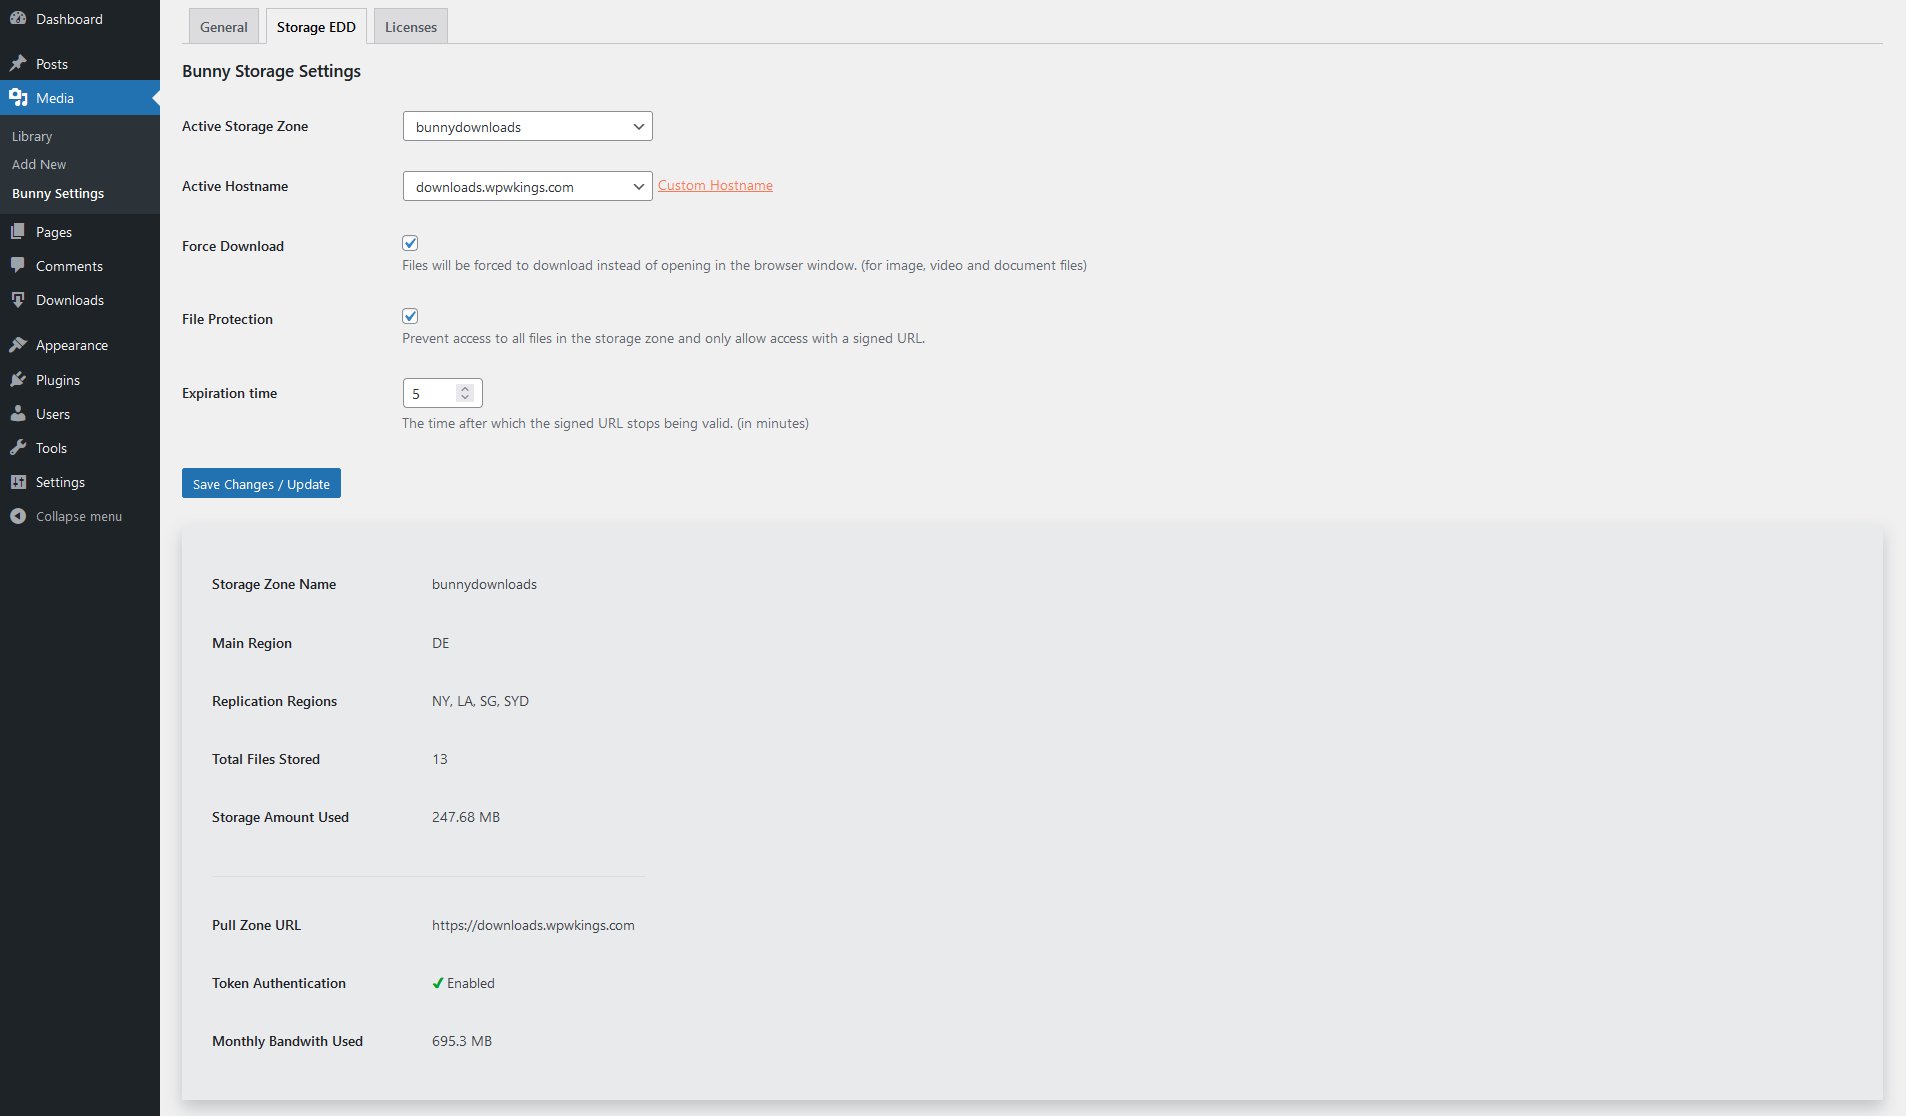
After the new hostname has been added, please update the plugin’s settings page on your WordPress site.
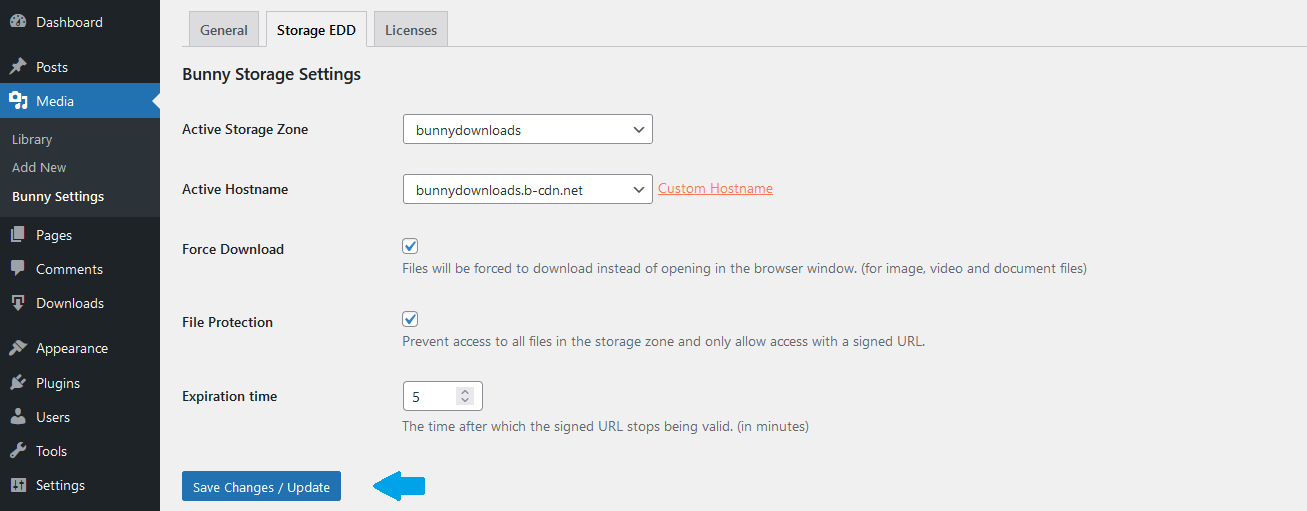
After loading the hostname, please select the new custom hostname from the dropdown and save the page again to complete the activation.
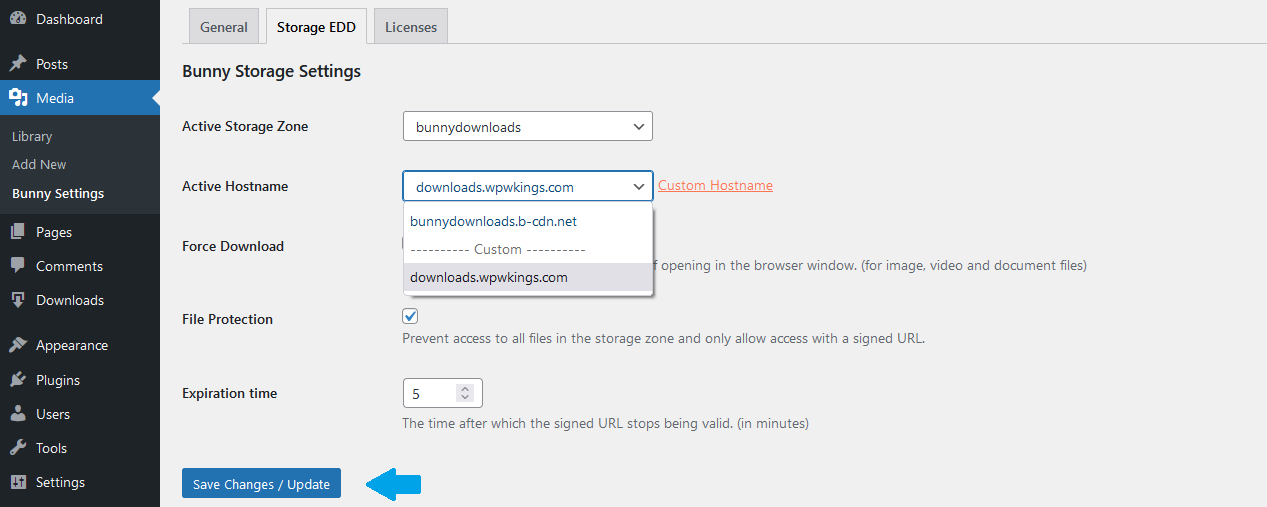
After activation you should be able to see your new custom hostname in the info table.
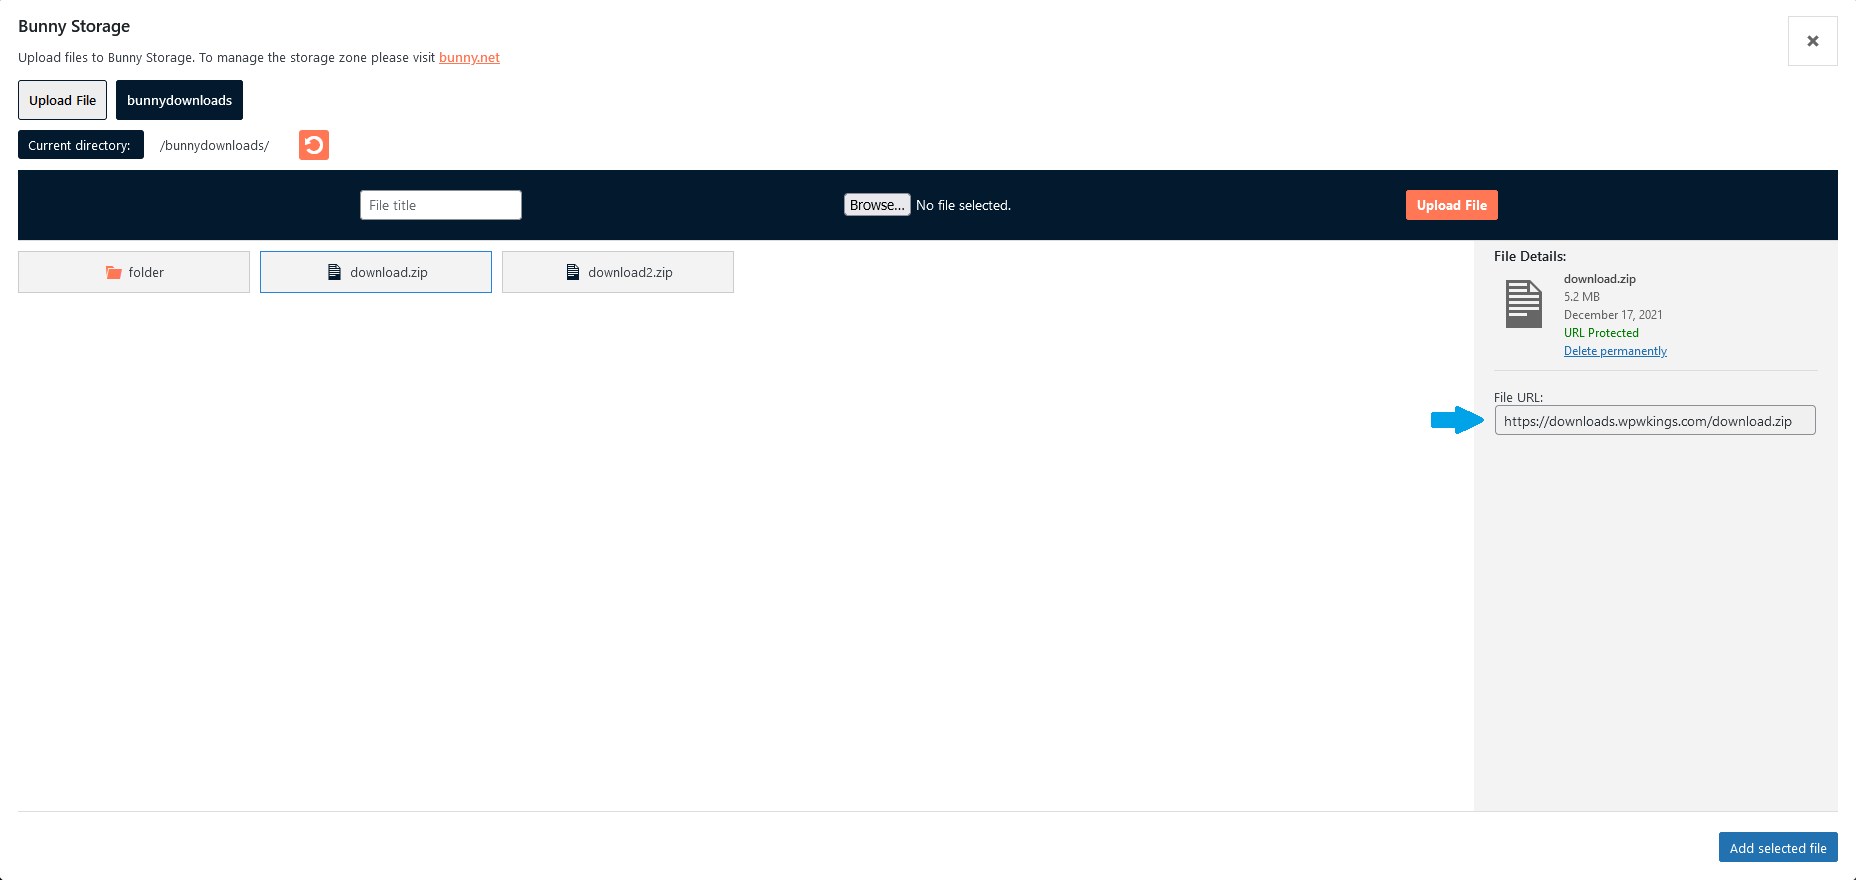
The custom hostname will now replace the b-cdn.net hostname inside of all download URLs.
For information about File Protection (Token Authentication) option, please continue here.